
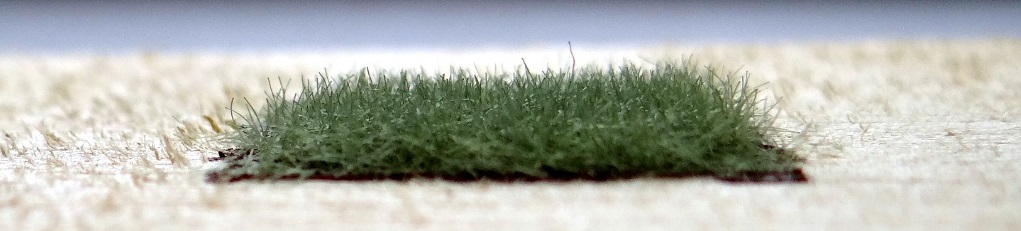
Static Grass Applicator
My father-in-law was building a model railway layout for the first time. He wanted to include realistic grass/undergrowth and liked the look of static grass, but couldn't justify spending £50 - £100 on the typical applicators that are available to buy on Amazon or E-Bay. The concept is simple... Ground the surface that will take the grass, create a static charge in the grass fibres, let the fibres settle on the adhesive surface. The static charge will cause the fibres to repel the grounded surface and stand on end until the glue has dried fixing them in that position.
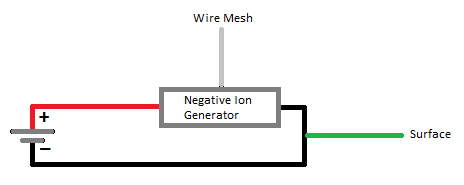
A quick Google shows there are many existing tutorials to make your own, but they usually involve overly complex circuits and plumbing pipe or hacking a fly swatter. The neccessary circuit is straight forward, and I thought I could package it more simply too. It's basically a charged wire mesh through which the static grass fibres are passed (so the charge is passed to each fibre) and a crocodile clip used to connect the negative side of the circuit to the surface on which the static grass will be applied.
The key component is a 'negative ion generator'. These are used in air ionisers and generate a very high voltage (with a very low current, so it's quite safe!). I used a £3 unit from E-Bay. The white high voltage line is attached to the wire mesh through which the static grass will be passed. Mine had a nylon brush on the end which I just snipped off exposing the bare wire.
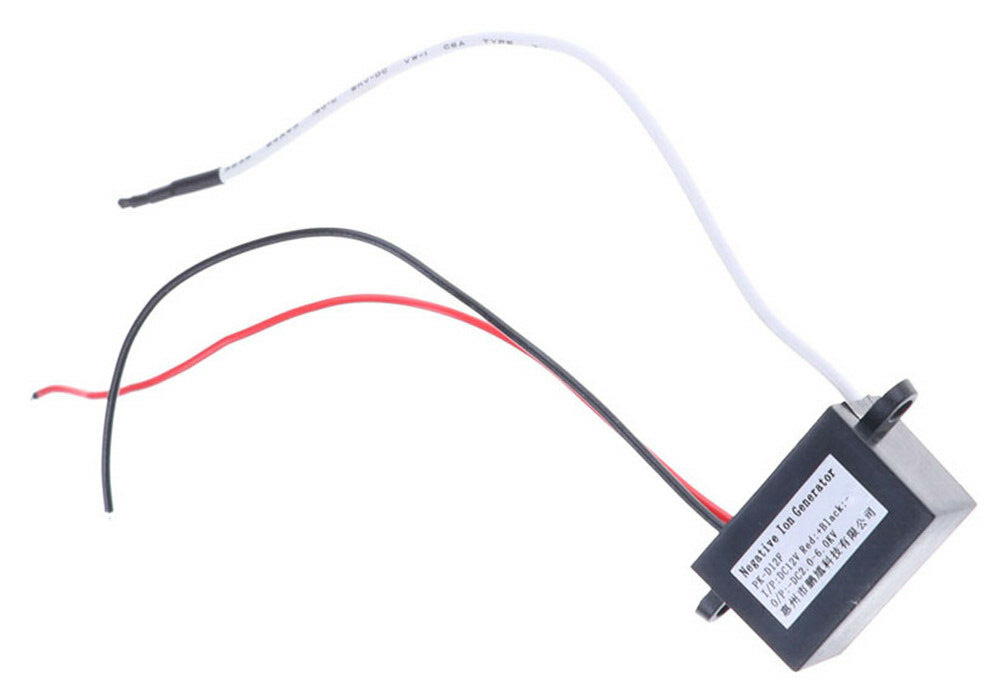
The negative ion generator is rated at 12V, but I've used a 9V battery, because I had a 9V battery connector available. So the high voltage output will just be a bit lower. It'll work just fine, but a higher input voltage would allow the device to be held a little further from the surface for the same results.
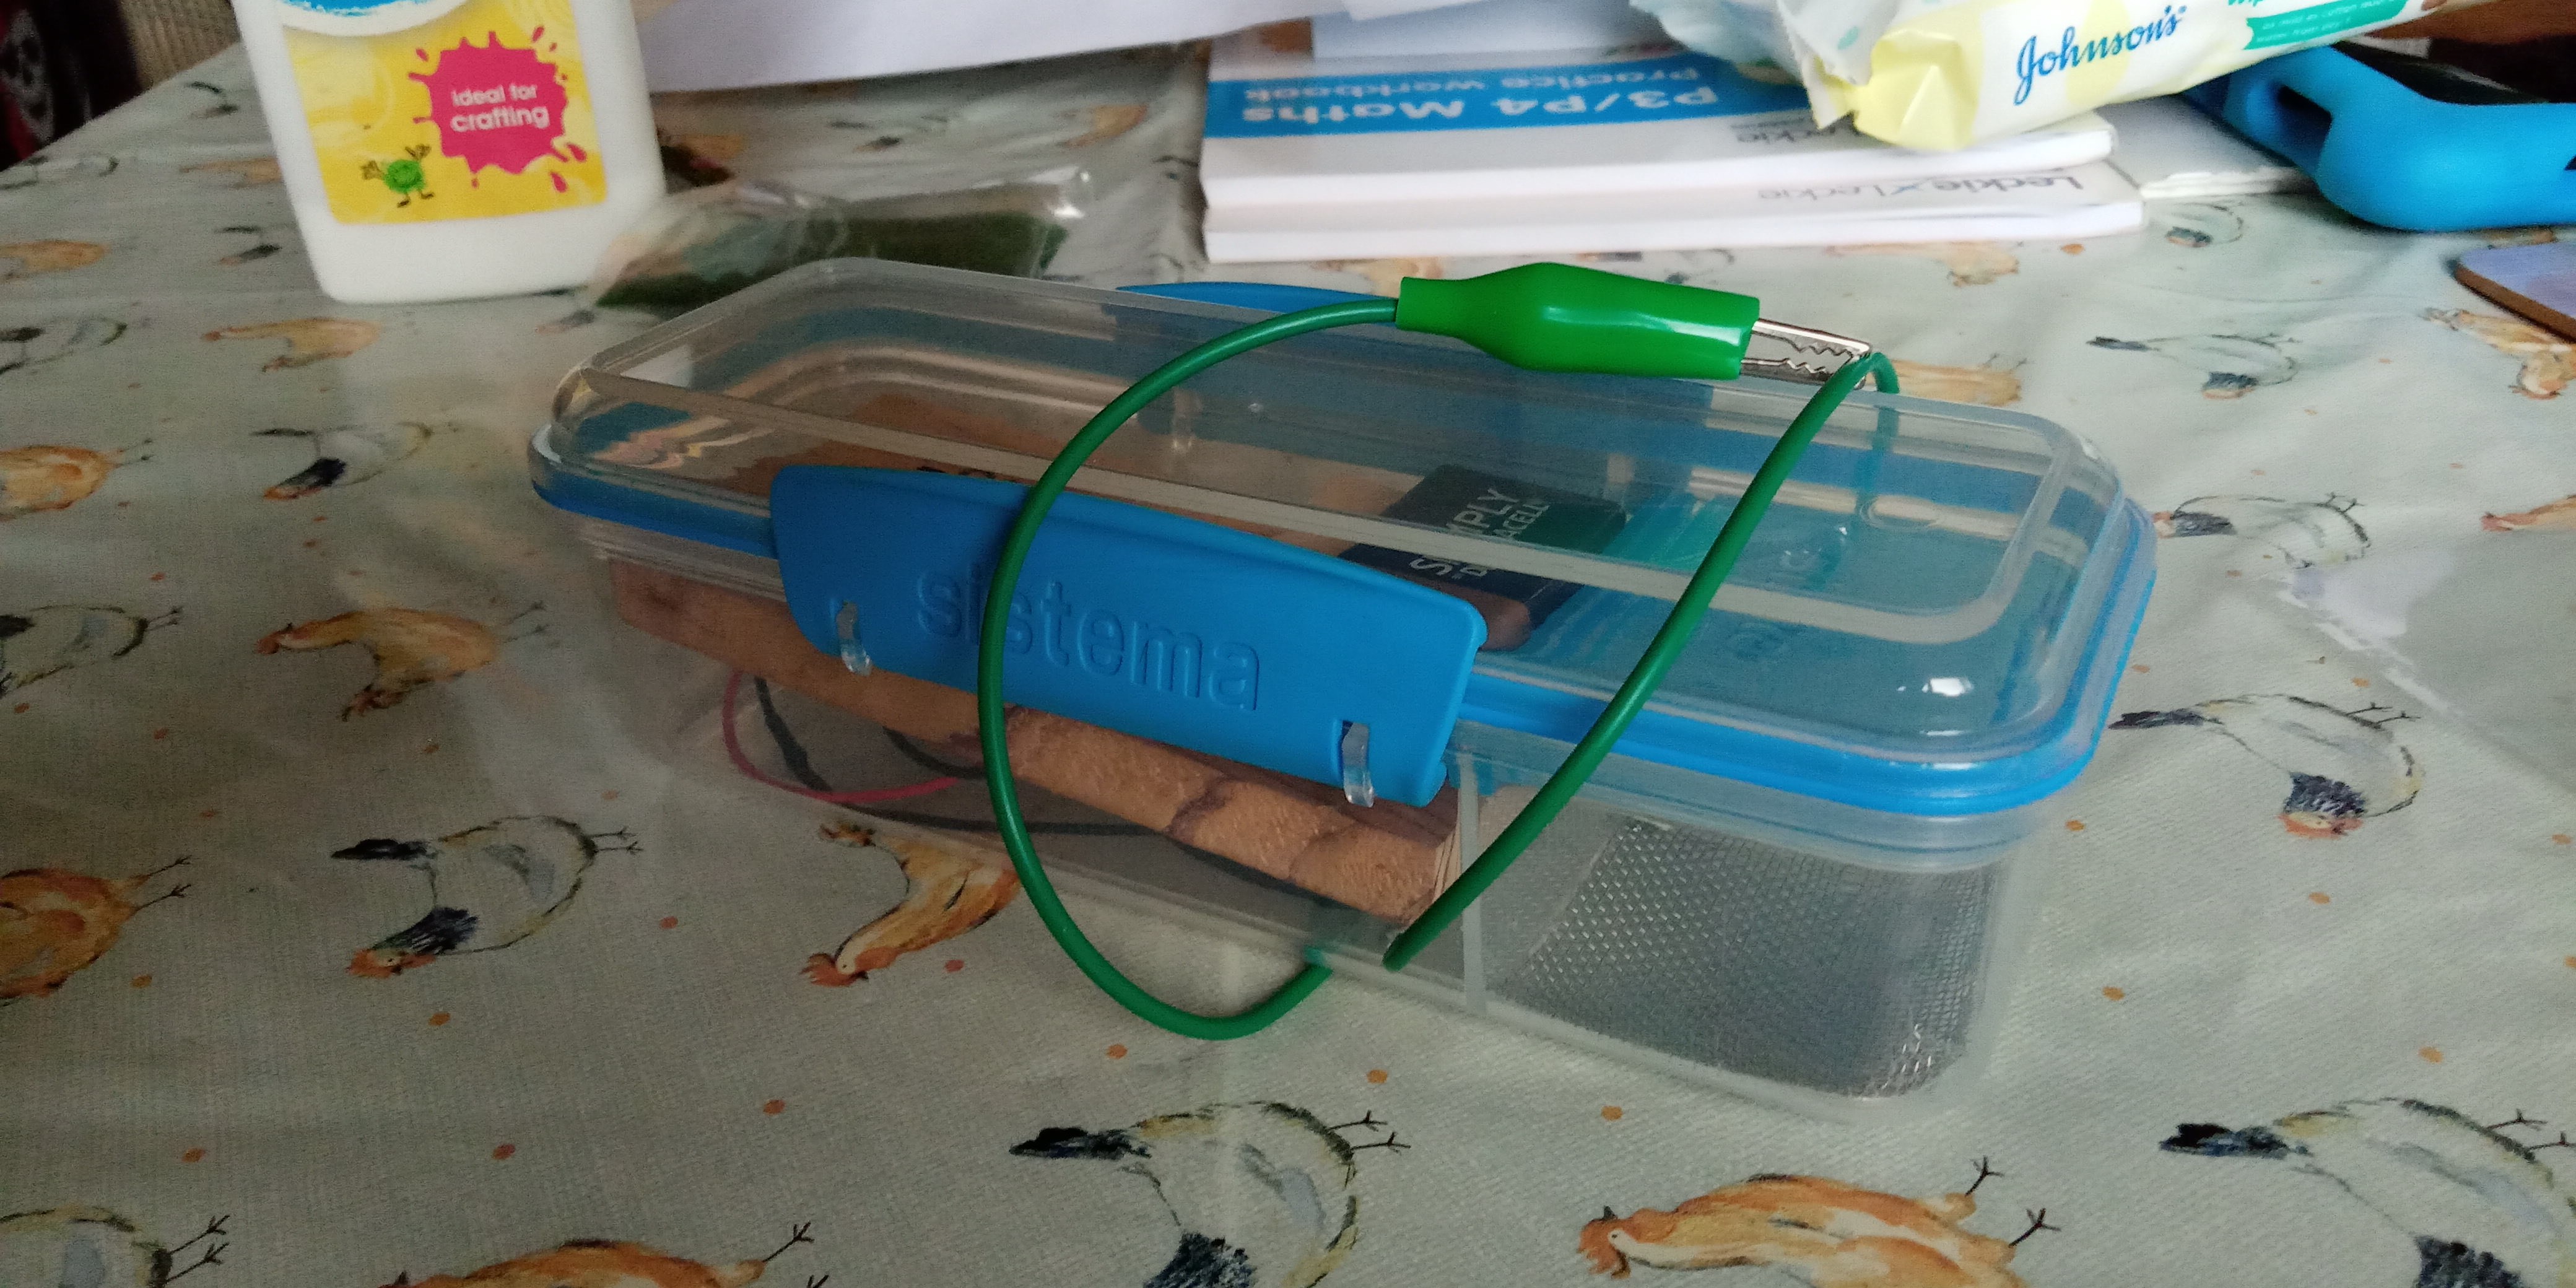
To house the whole thing I used a £4, two sided tupperware pot; one side contains the electronics, the other the wire mesh and the static grass. A hole drilled between the two sides of the tupperware pot allows the high voltage wire to be soldered to the wire mesh. The wire mesh I used has 3mm holes, depending on the length of the static grass fibres, a different sized mesh may be more appropriate. The wire mesh cost £3 for far more than I needed for this project. I also added a switch to turn it on/off, but you could just as easily just disconnect the battery. I had the switch, a crocodile clip, battery connector and wire to hand, so the grand total for the project came to about £10. Not bad.
How to use it:
- Apply glue to the surface that will take the static grass.
- Connect the crocodile clip (ground) to the surface.
- Turn on the static grass applicator.
- Put the grass fibres on top of the wire mesh.
- Hold the device so the wire mesh is 1 or 2 cm above the surface.
- Gently shake the applicator so the grass fibres fall through the mesh onto the glued surface.